How to Use Samsung Odin: The Complete Firmware Flashing Guide
What is Samsung Odin?
Samsung Odin (often just called Odin) is a widely known firmware flashing software tool used primarily for Samsung Galaxy smartphones and tablets running Android. While reportedly developed by Samsung for internal or service center use, it has become widely available and is the standard method for manually installing official Samsung firmware packages (usually in .tar or .tar.md5 format) onto devices.
Odin allows users to perform several key tasks, including:
- Flashing Stock Firmware: This is the most common use. It allows you to manually install or reinstall the official Samsung operating system software. This is often done to:
- Fix software issues (boot loops, crashes, errors).
- Upgrade or downgrade the Android version (if the bootloader allows).
- Return to stock software after using custom ROMs.
- Unbrick a device stuck in a non-booting state.
- Flashing Custom Recovery: Installing custom recovery environments like TWRP (though this often requires an unlocked bootloader).
- Flashing Root Packages: Installing files required for rooting the device (like CF-Auto-Root or Magisk-patched files, also typically needs an unlocked bootloader).
- Flashing Modem/Bootloader Files: Updating specific components of the device firmware individually (for advanced users).
Odin runs on Windows PCs and communicates with Samsung devices when they are put into a special "Download Mode".

Essential Prerequisites Before Using Odin
Before you begin flashing anything with Odin, ensure you have the following prepared. Skipping these steps is the most common reason for failures or bricked devices:
- Install Samsung USB Drivers: Your computer MUST have the official Samsung USB drivers installed so it can recognize your device in Download Mode. Download and install the latest version.
- Download Correct Firmware: This is CRITICAL. Download the official Samsung firmware package (
.tar.md5file or files) specifically designed for your exact device model number (e.g., SM-G998U), region/carrier (CSC), and potentially binary version (SW REV). Flashing incompatible firmware will likely brick your device. Use reliable sources like SamFW, SamMobile, Frija, or Bifrost Samsung Firmware Downloader. - Backup Your Data: Depending on the files flashed (especially the CSC file), Odin flashing WILL ERASE ALL DATA on your device (internal storage). Back up photos, contacts, apps, messages, and everything important before proceeding.
- Charge Your Device: Ensure your Samsung device has at least 50-60% battery charge. A power interruption during flashing can brick the device.
- Windows PC: Odin is a Windows application.
- Quality USB Cable: Use the original Samsung USB cable or a high-quality data cable. Faulty cables can cause failures.
- Download Odin: Download a reliable version of the Odin tool itself. Newer device firmware often requires newer Odin versions. Extract the Odin zip file to a folder on your PC.
- Disable Samsung Kies/Smart Switch: If you have Samsung's official PC suite software running, close it completely as it can interfere with Odin's connection.
⚠️ Critical Warnings & Disclaimers
- Bricking Risk: Using the wrong firmware, interrupting the flash, or using incompatible files can brick your device, making it unusable.
- Data Loss: Flashing generally involves data loss. Backup is mandatory.
- Warranty Void / Knox Trip: Flashing non-official binaries (like custom recovery or root files) or sometimes even official firmware under certain conditions can trip the Samsung Knox security counter, permanently voiding the warranty and potentially disabling features like Samsung Pay or Secure Folder. Flashing official stock firmware usually doesn't trip Knox *if done correctly*.
- Download Source Risk: Ensure firmware and Odin are downloaded from reputable sources to avoid malware.
- Proceed at Your Own Risk: You are solely responsible for any actions taken with Odin and any resulting consequences. We (firmware.repairtofix.com) are not liable for any damage.
How to Enter Samsung Download Mode (Odin Mode)
To use Odin, your Samsung device must be in Download Mode:
- Power Off your Samsung device completely.
- Enter Download Mode Combination: This varies slightly by model:
- Older devices with Home button: Press and hold Volume Down + Home Button + Power Button simultaneously for a few seconds.
- Newer devices without Home button (with Bixby button): Press and hold Volume Down + Bixby Button + Power Button simultaneously for a few seconds.
- Newer devices without Home or Bixby button: Some may require pressing and holding Volume Up + Volume Down buttons simultaneously and then connecting the USB cable to the PC. Others might use Volume Down + Power Button.
- Tip: If unsure, search online for "How to enter Download Mode [Your Exact Device Model]".
- Confirmation Screen: You should see a warning screen (often blue or teal) about custom OS. Press the Volume Up button once to continue into Download Mode. You'll typically see "Downloading..." text on the screen.
How To Flash Firmware Using Samsung Odin
Once prerequisites are met and the device is in Download Mode:
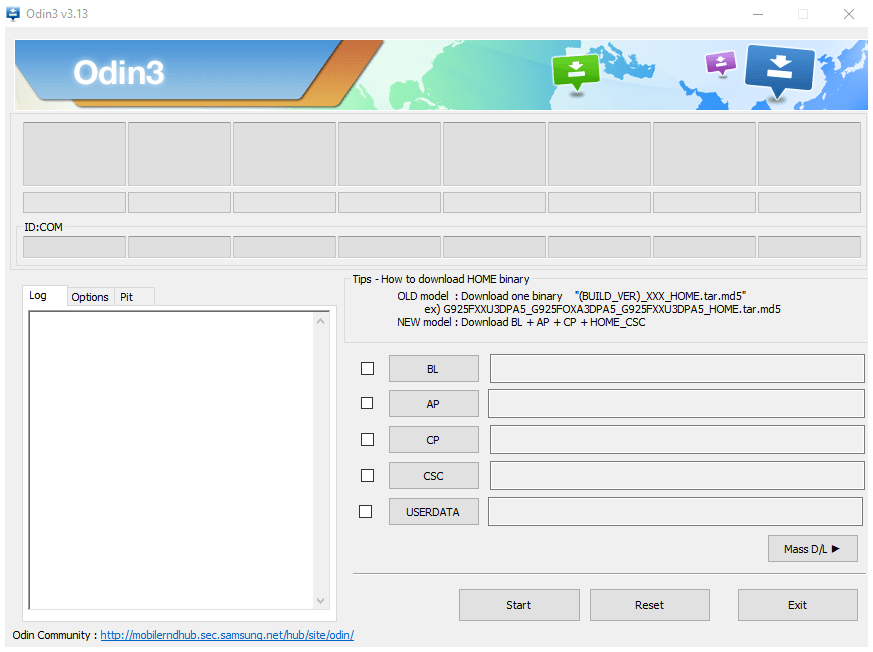
- Extract Odin & Firmware: Ensure both the Odin zip file and the downloaded firmware zip file are extracted into separate folders on your PC. Firmware packages often contain multiple files starting with BL, AP, CP, and CSC.
- Launch Odin: Navigate to the extracted Odin folder and double-click
Odin3 vX.XX.exe(the version number will vary). Grant administrator rights if prompted. - Connect Device: Connect your Samsung device (already in Download Mode) to your computer using the USB cable.
- Check Connection in Odin: Wait a few moments. Odin should recognize the device. You will see a message like "Added!!" in the Log tab, and one of the ID:COM boxes near the top-left should turn blue (or another color depending on the Odin version) indicating a successful connection. If not, recheck drivers and the USB connection.
- Load Firmware Files: This depends on whether your firmware package contains multiple files or a single large file:
- For Multiple Files (Recommended for clean install):
- Click the BL button in Odin and select the file starting with `BL_...` from your extracted firmware folder.
- Click the AP button and select the largest file, starting with `AP_...`. (This contains the main operating system and can take a moment to load).
- Click the CP button and select the file starting with `CP_...` (This is the modem/radio firmware).
- Click the CSC button and select the file starting with `CSC_...` OR `HOME_CSC_...`.
- IMPORTANT: Choose `CSC_...` if you want a clean flash (it will factory reset your device, wiping all data).
- Choose `HOME_CSC_...` if you want to attempt upgrading/reflashing while potentially keeping your data intact (backup still recommended!). Not always possible or effective.
- For a Single File Package:
- Sometimes firmware comes as one large
.tar.md5file. In this case, click the AP button in Odin and select that single large file. Leave BL, CP, and CSC empty. (This often preserves data but might not fix deeper issues).
- Sometimes firmware comes as one large
- For Multiple Files (Recommended for clean install):
- Check Odin Options:
- Go to the "Options" tab in Odin.
- Ensure that "Auto Reboot" and "F. Reset Time" are usually checked by default. Leave them checked unless a specific guide tells you otherwise.
- CRITICAL: Make absolutely sure that "Re-Partition" is NOT checked unless you are using a PIT file and following a very specific guide that requires it. Checking Re-Partition unnecessarily can brick your device.
- Start Flashing: Once files are loaded and options are checked, click the "Start" button in Odin.
- Monitor Progress: Odin will show a progress bar above the ID:COM box, and detailed logs will appear in the Message tab. Do NOT disconnect the device during this process. It can take 5-15 minutes.
- PASS! Message: When the flashing is successfully completed, the progress box in Odin will turn green and display the word "PASS!".
- Device Reboot: Your Samsung device should automatically reboot (if "Auto Reboot" was checked).
- Disconnect & Wait: You can now disconnect the USB cable. The first boot after flashing can take much longer than usual (5-15 minutes) as the system initializes. Be patient.
Common Odin Troubleshooting
- Odin Doesn't Detect Device ("Added!!" message doesn't appear): Reinstall drivers. Try a different USB port/cable. Ensure the device is fully in Download Mode (pressed Vol Up at warning screen). Close Kies/Smart Switch. Run Odin as Administrator.
- Odin Shows "FAIL!" (often in red): This can happen for many reasons:
- Incorrect/incompatible firmware file (wrong model, region, or binary version).
- Bad download (corrupted firmware file - verify MD5 if possible or re-download).
- Faulty USB cable or port.
- Outdated Odin version (try a newer one).
- Security restrictions on the device (e.g., FRP lock, OEM unlock not enabled before trying custom binaries).
- Odin Gets Stuck (on `SetupConnection`, `NAND Write`, etc.): Try a different USB port (USB 2.0 sometimes works better than 3.0). Use a different USB cable. Try running Odin as Administrator. Re-download the firmware. Try a different Odin version.
- Device Boot Loops After PASS!: May require a factory reset from the Android Recovery Menu (Volume Up + Power +/- Home/Bixby). This happens more often if you flashed a CSC file without wiping data first or if there was an issue during the flash. Flashing with the `CSC_...` file (not `HOME_CSC_...`) usually resolves this by forcing a clean wipe.
Conclusion
Samsung Odin is an essential tool for many Samsung Galaxy users needing to manually manage their device firmware. While powerful for fixing issues, upgrading, or restoring stock software, it demands careful attention to detail. Always double-check your device model, download the correct firmware from trusted sources, ensure drivers are installed, back up your data, and understand the function of each Odin slot (especially CSC vs. HOME_CSC) before clicking "Start". Used correctly, Odin is reliable; used incorrectly, it can cause serious problems.
Download Files
Please subscribe to our channel to access files
Related Posts
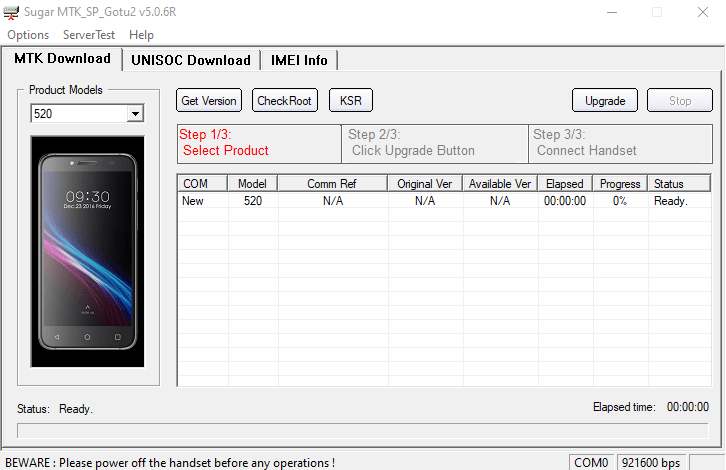
Sugar MTK SP Tool: A Guide to Flashing MediaTek Devices
Explore the Sugar MTK SP Tool, a Windows application for flashing stock firmware on Android devices with MediaTek (MTK) chipsets. Learn about its potential uses, prerequisites like MTK VCOM drivers, and general flashing steps.

What is FRP Lock? Understanding Google Factory Reset Protection
Learn about Google's Factory Reset Protection (FRP) lock on Android devices. Understand why it exists, how to identify it, and the correct ways to disable or avoid it before resetting or selling your phone. Essential information for all Android users.

Samsung Kies: PC Suite for Older Samsung Devices (Download & Info)
Learn about Samsung Kies, the legacy PC suite software for older Samsung mobile phones and tablets. Understand its functions like data synchronization, backups, and firmware updates. Information on different Kies versions and the current alternative, Smart Switch.
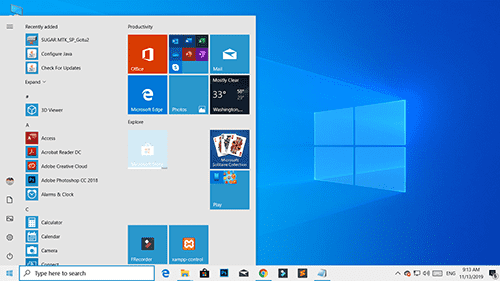
Windows 10 Version 1909 (November 2019 Update): Features & Overview
A look back at the features and changes introduced in Windows 10 version 1909, also known as the November 2019 Update (19H2). Learn about notification enhancements, calendar quick-creation, and File Explorer updates from this past release.
What is Miracle Box? Understanding This Mobile Repair & Flashing Tool
Explore Miracle Box, a servicing tool for mobile phone repair, primarily for Chinese and MediaTek/Spreadtrum devices. Learn about its features like firmware flashing, unlocking, and repair capabilities. Understand the difference between official hardware and software versions.
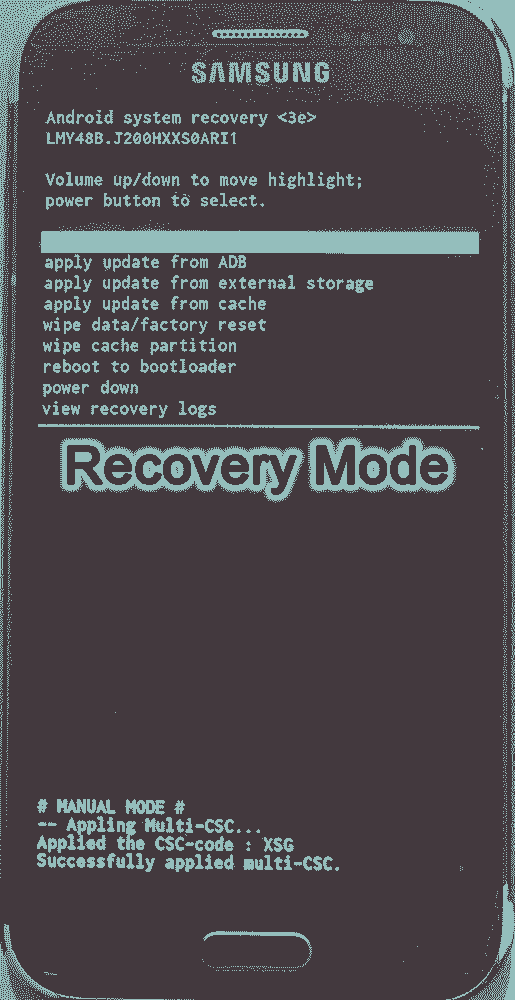
Android Recovery Mode: Access, Functions & Flashing Guide (Stock vs. Custom)
Learn about Android Recovery Mode, its functions like factory reset and cache wipe, and how to access it. Understand the crucial differences between Stock Recovery and Custom Recovery (TWRP/CWM) for flashing update zips or custom ROMs.